• Style
  • Beauty
  • Contact
  • LTK Feed
The Chan Chic
  • Style
  • Beauty
  • Contact
  • LTK Feed

My Top Affordable Makeup Picks

Hello loves! My last beauty post was all about my favorite high end beauty products at Sephora, so in today’s post I thought I would show y’all the opposite end of the spectrum and break down my favorite budget friendly makeup products that are available at Ulta. I’m not calling this a “drugstore makeup favorites” because technically two of the products are only available at Ulta, but everything here is budget friendly (the most expensive product is $23). If you’re in the market for some new affordable makeup, I hope you find this post helpful!

Wet N Wild Highlighter

This highlighter is one of the only ones at the drugstore that I think is comparable to highlighters from high end brands. The shade Precious Petals is my favorite; it’s a champagne color with a hint of peach. This product is buildable, so it’s perfect for creating both a light glow, and a blinding highlight.

L’Oreal Infalliable Super Slim Liquid Liner

This eyeliner is super easy to apply and doesn’t smudge throughout the day. I use the blackest black shade and I love how opaque it is. If you’re just starting to dabble in liquid eyeliner, I recommend this one because the pen applicator is easy to get the hang of.

Colourpop Lipstick

This lipstick formula is so good I can’t believe it’s only $7. I have the shades lay over and LA lady and absolutely love them both. The actual lipstick also have stars embossed on the side which is an adorable touch. If you’re in the market for an affordable matte lipstick you definitely need to check this formula out.

Covergirl Clean Matte BB Cream

This is my go-to for days where my skin needs coverage, but I don’t want to wear full on foundation. I also love that this BB cream dries down matte. The formula is oil free which is perfect for preventing clogged pores.

Morphe 35O Eyeshadow Palette

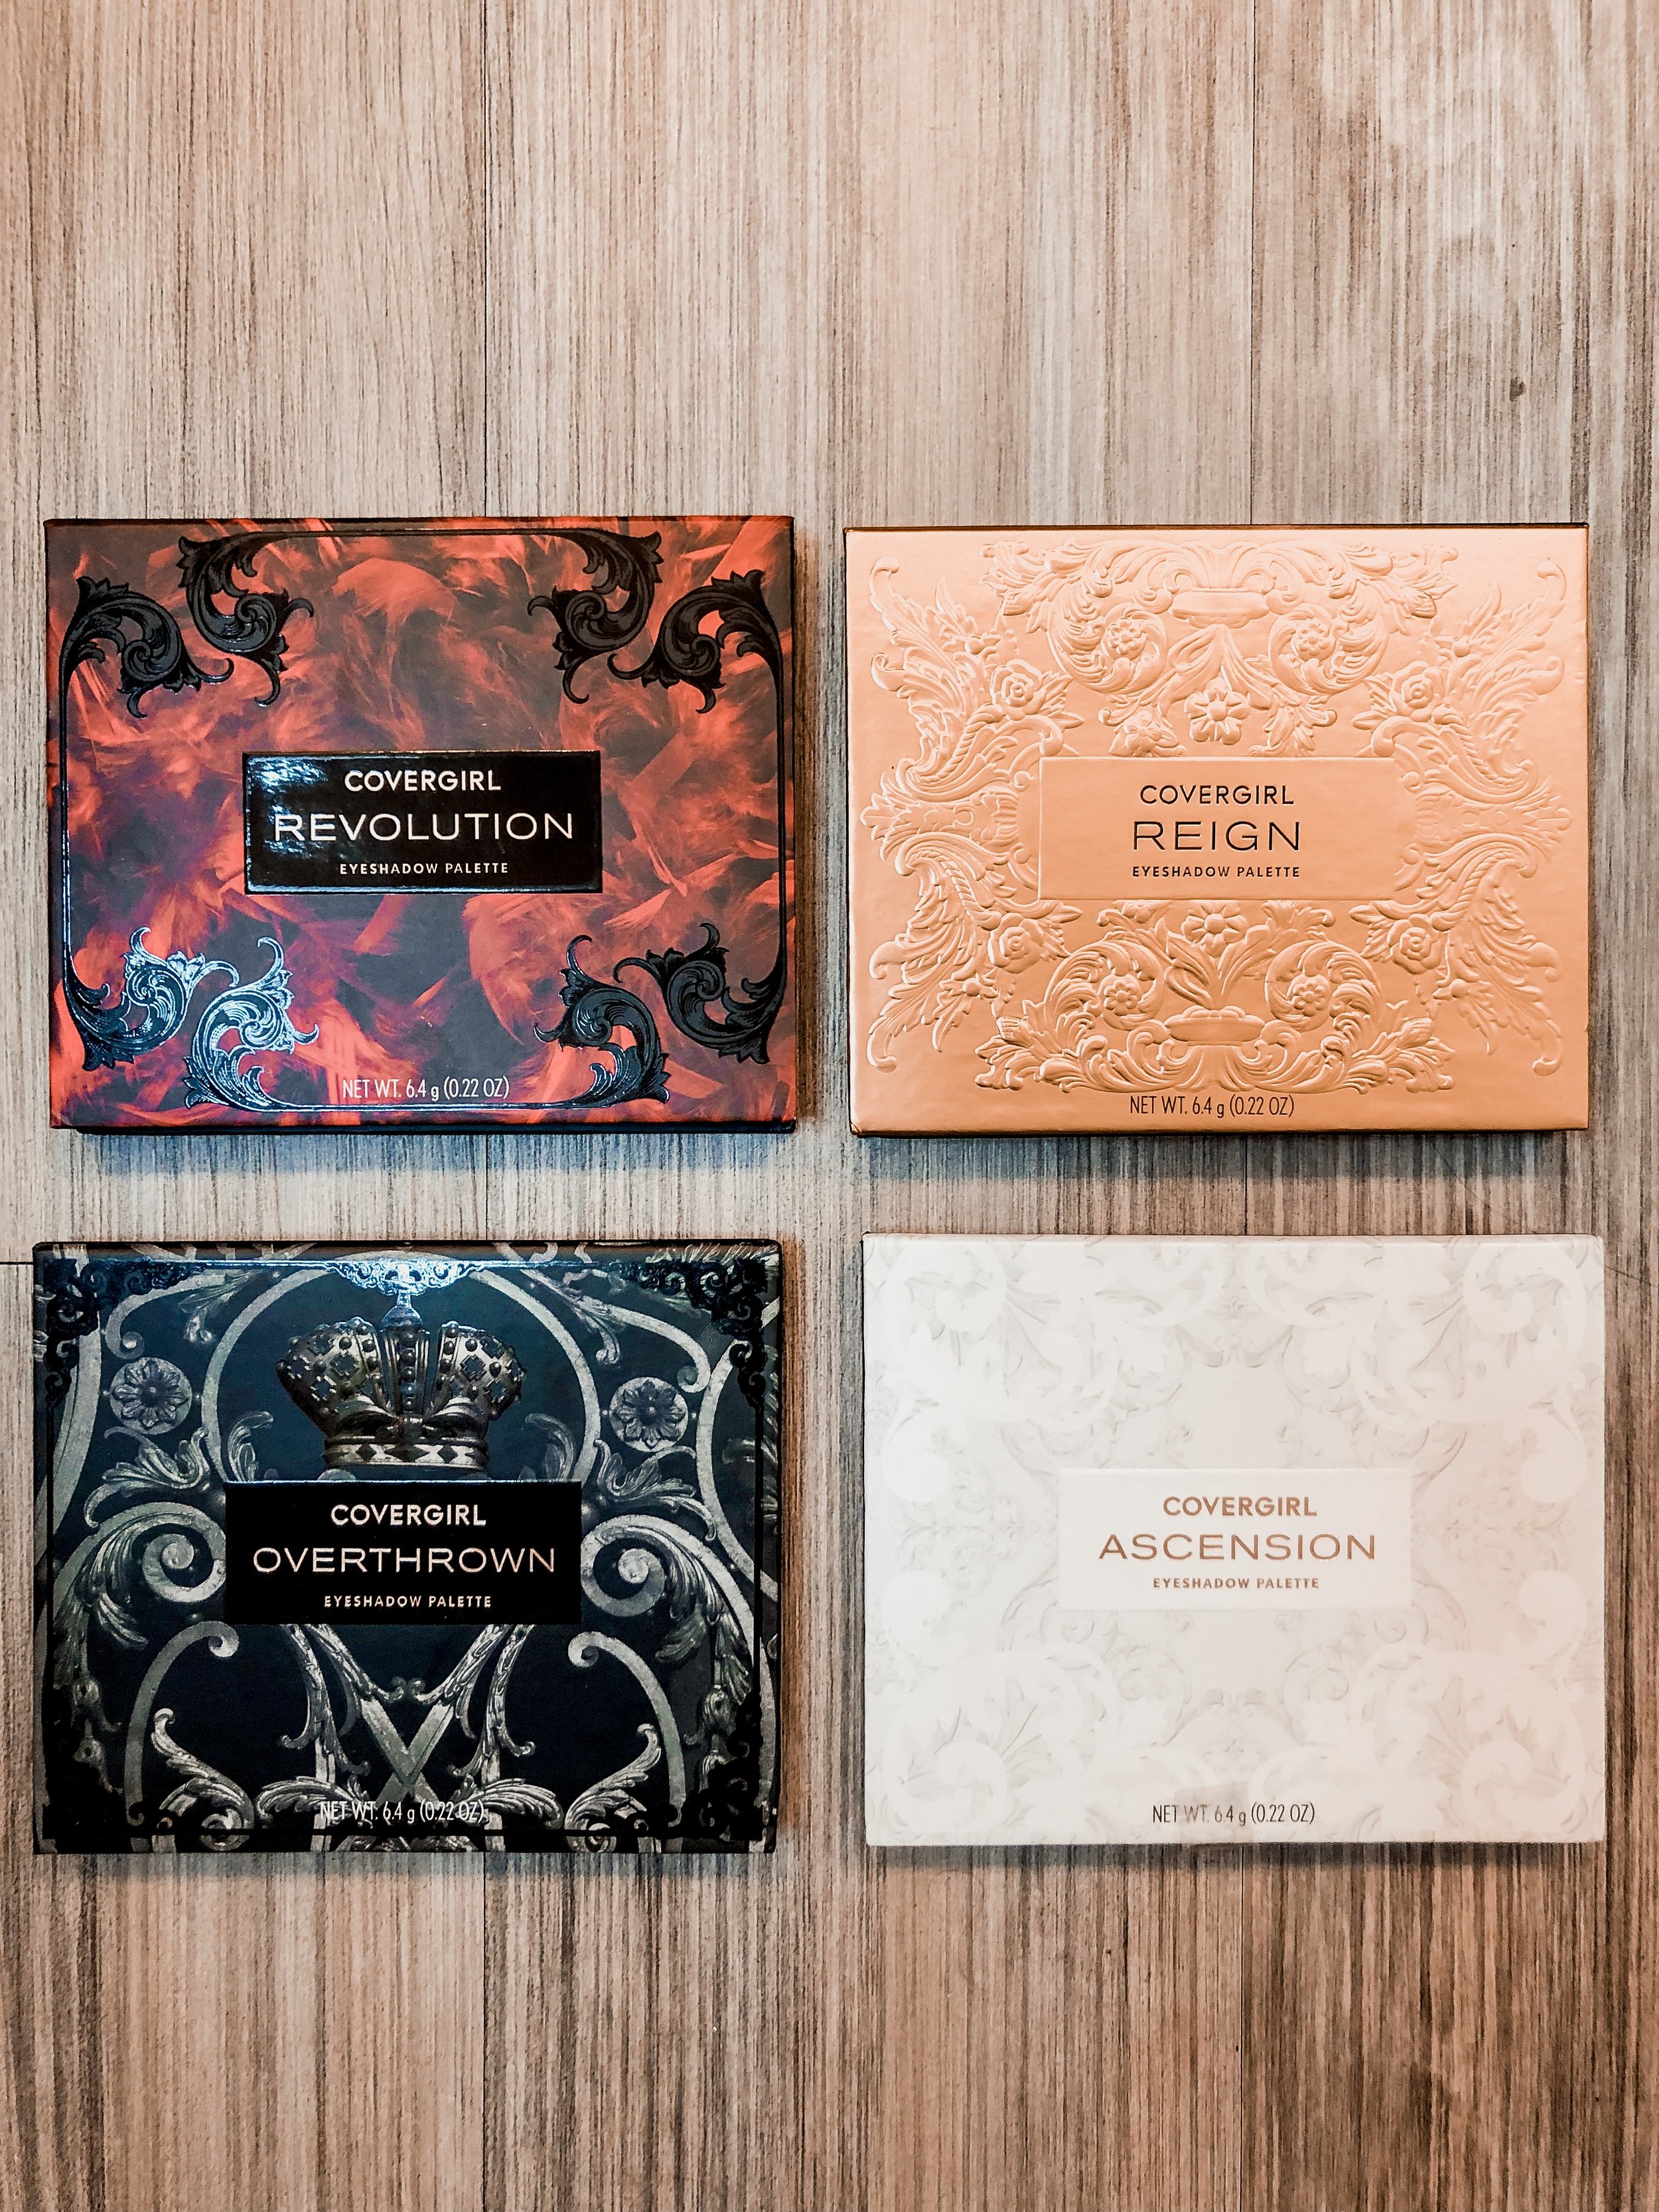
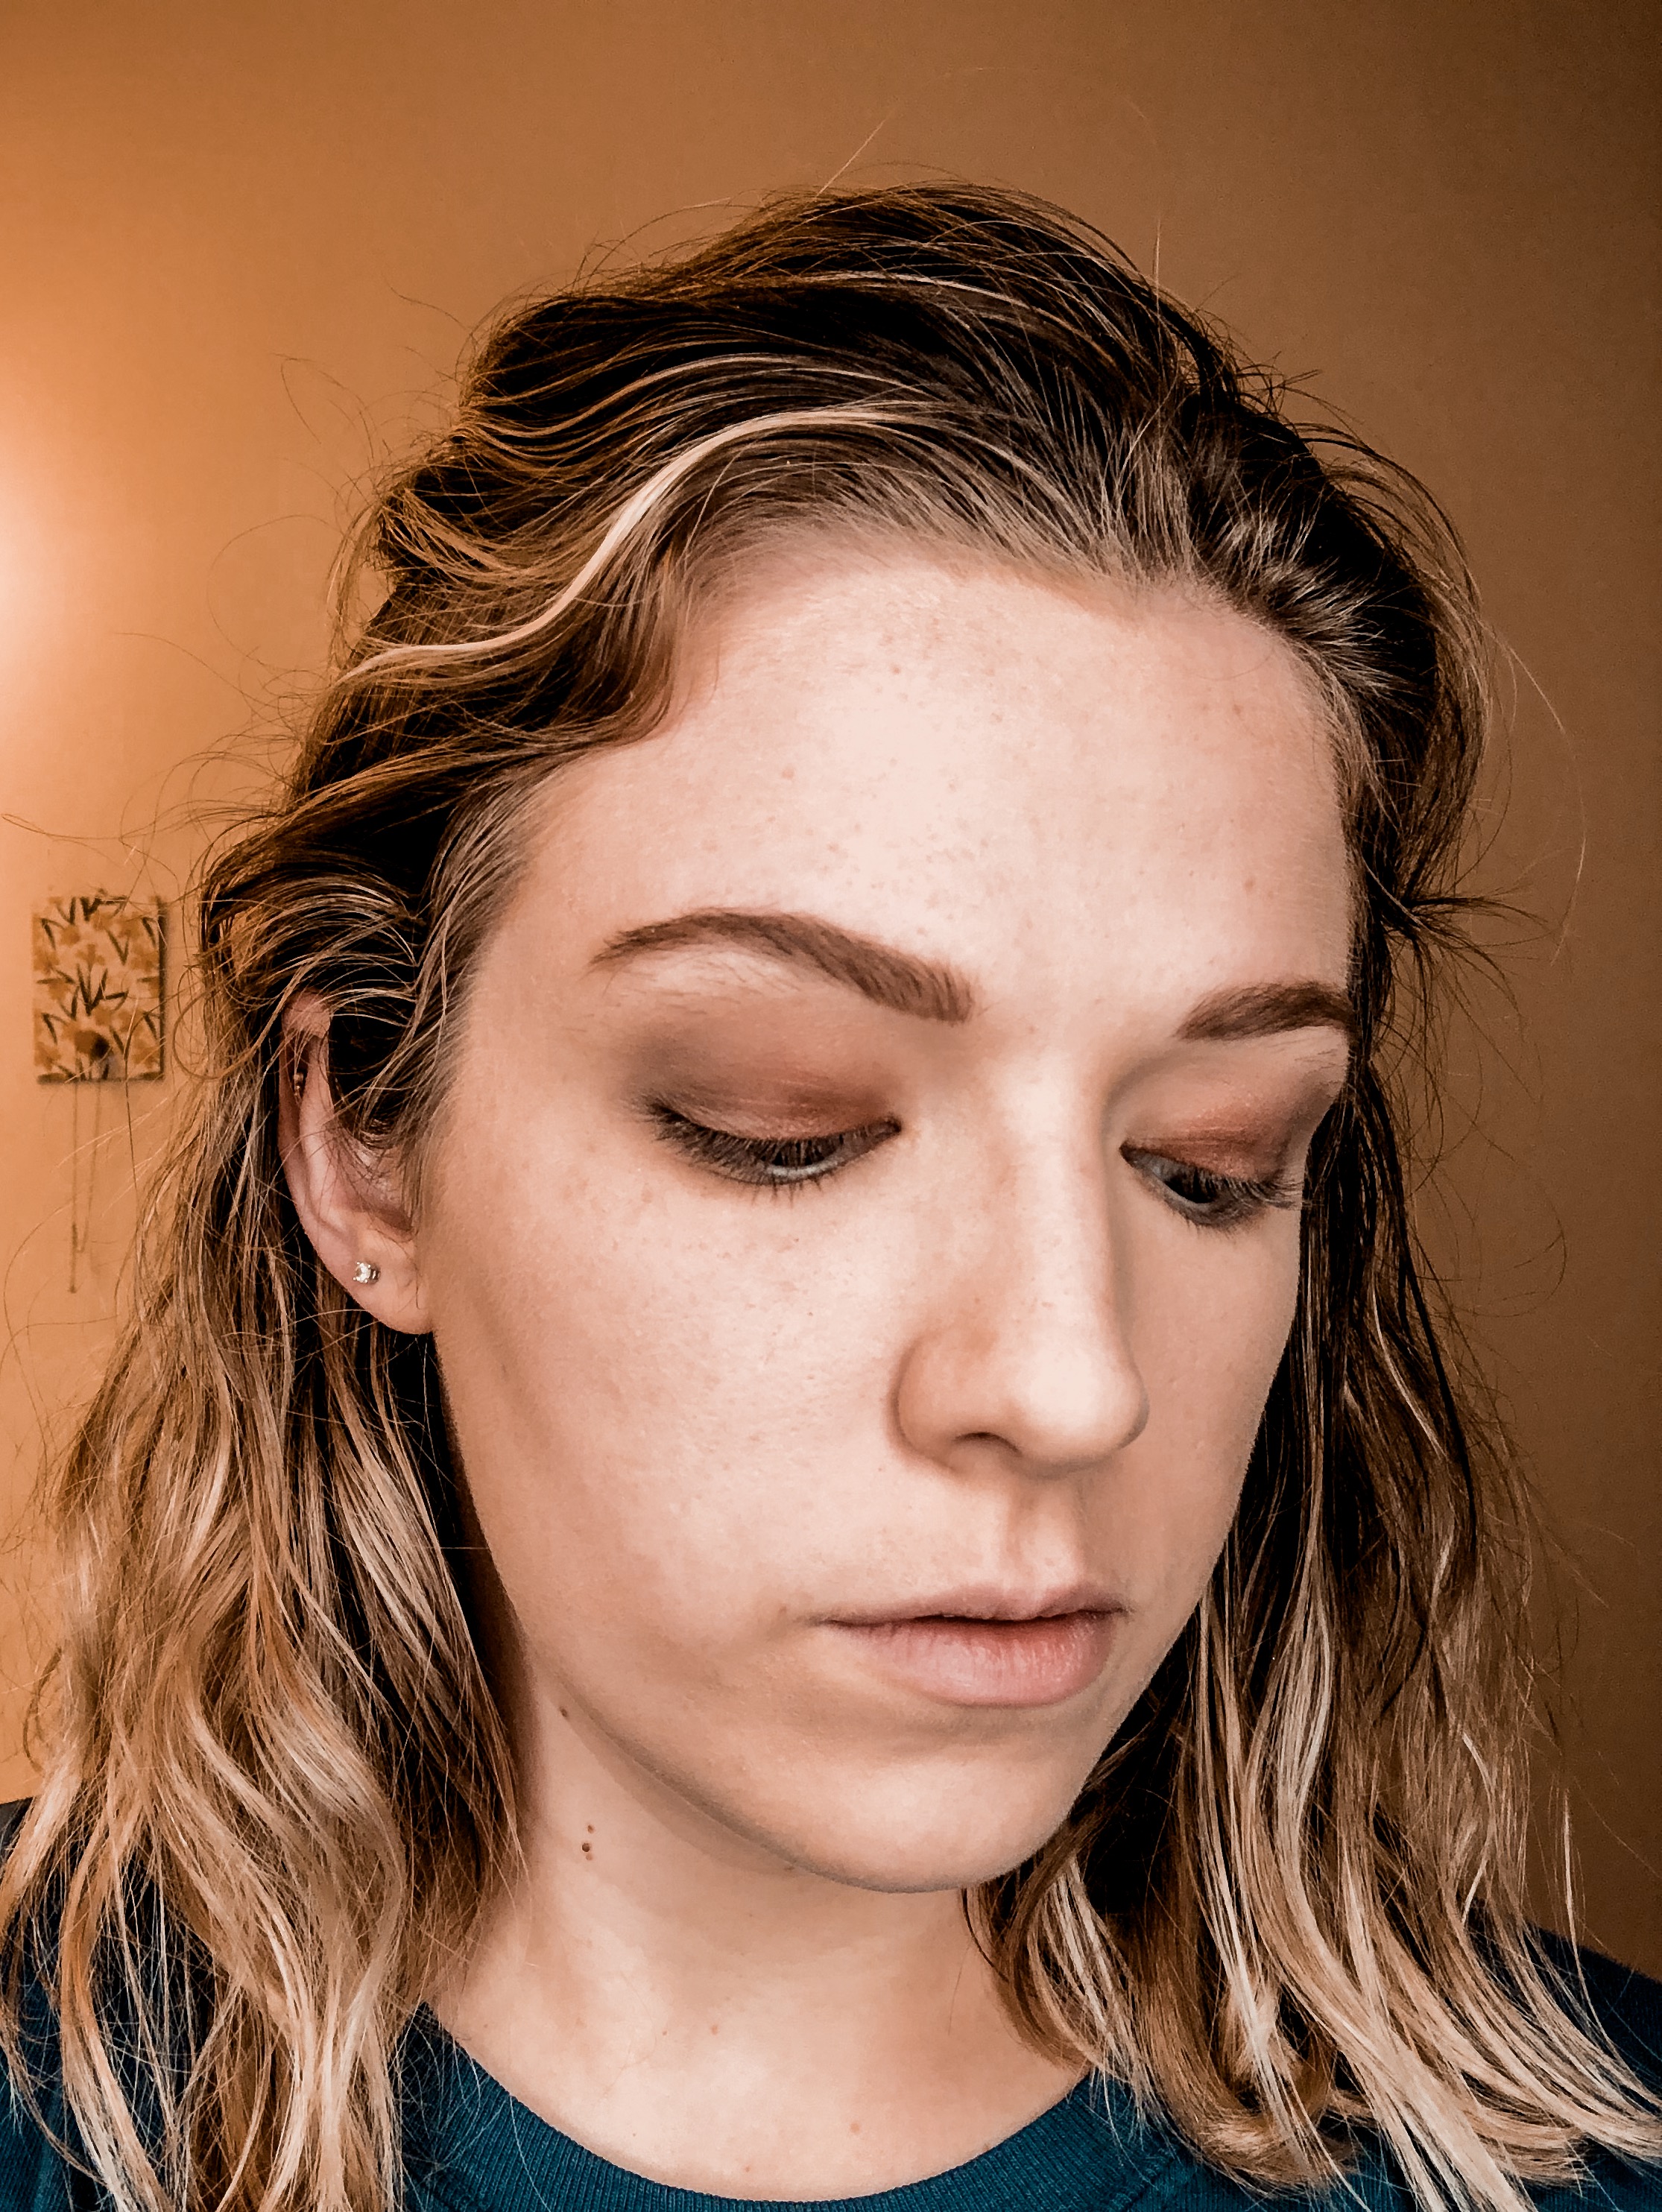
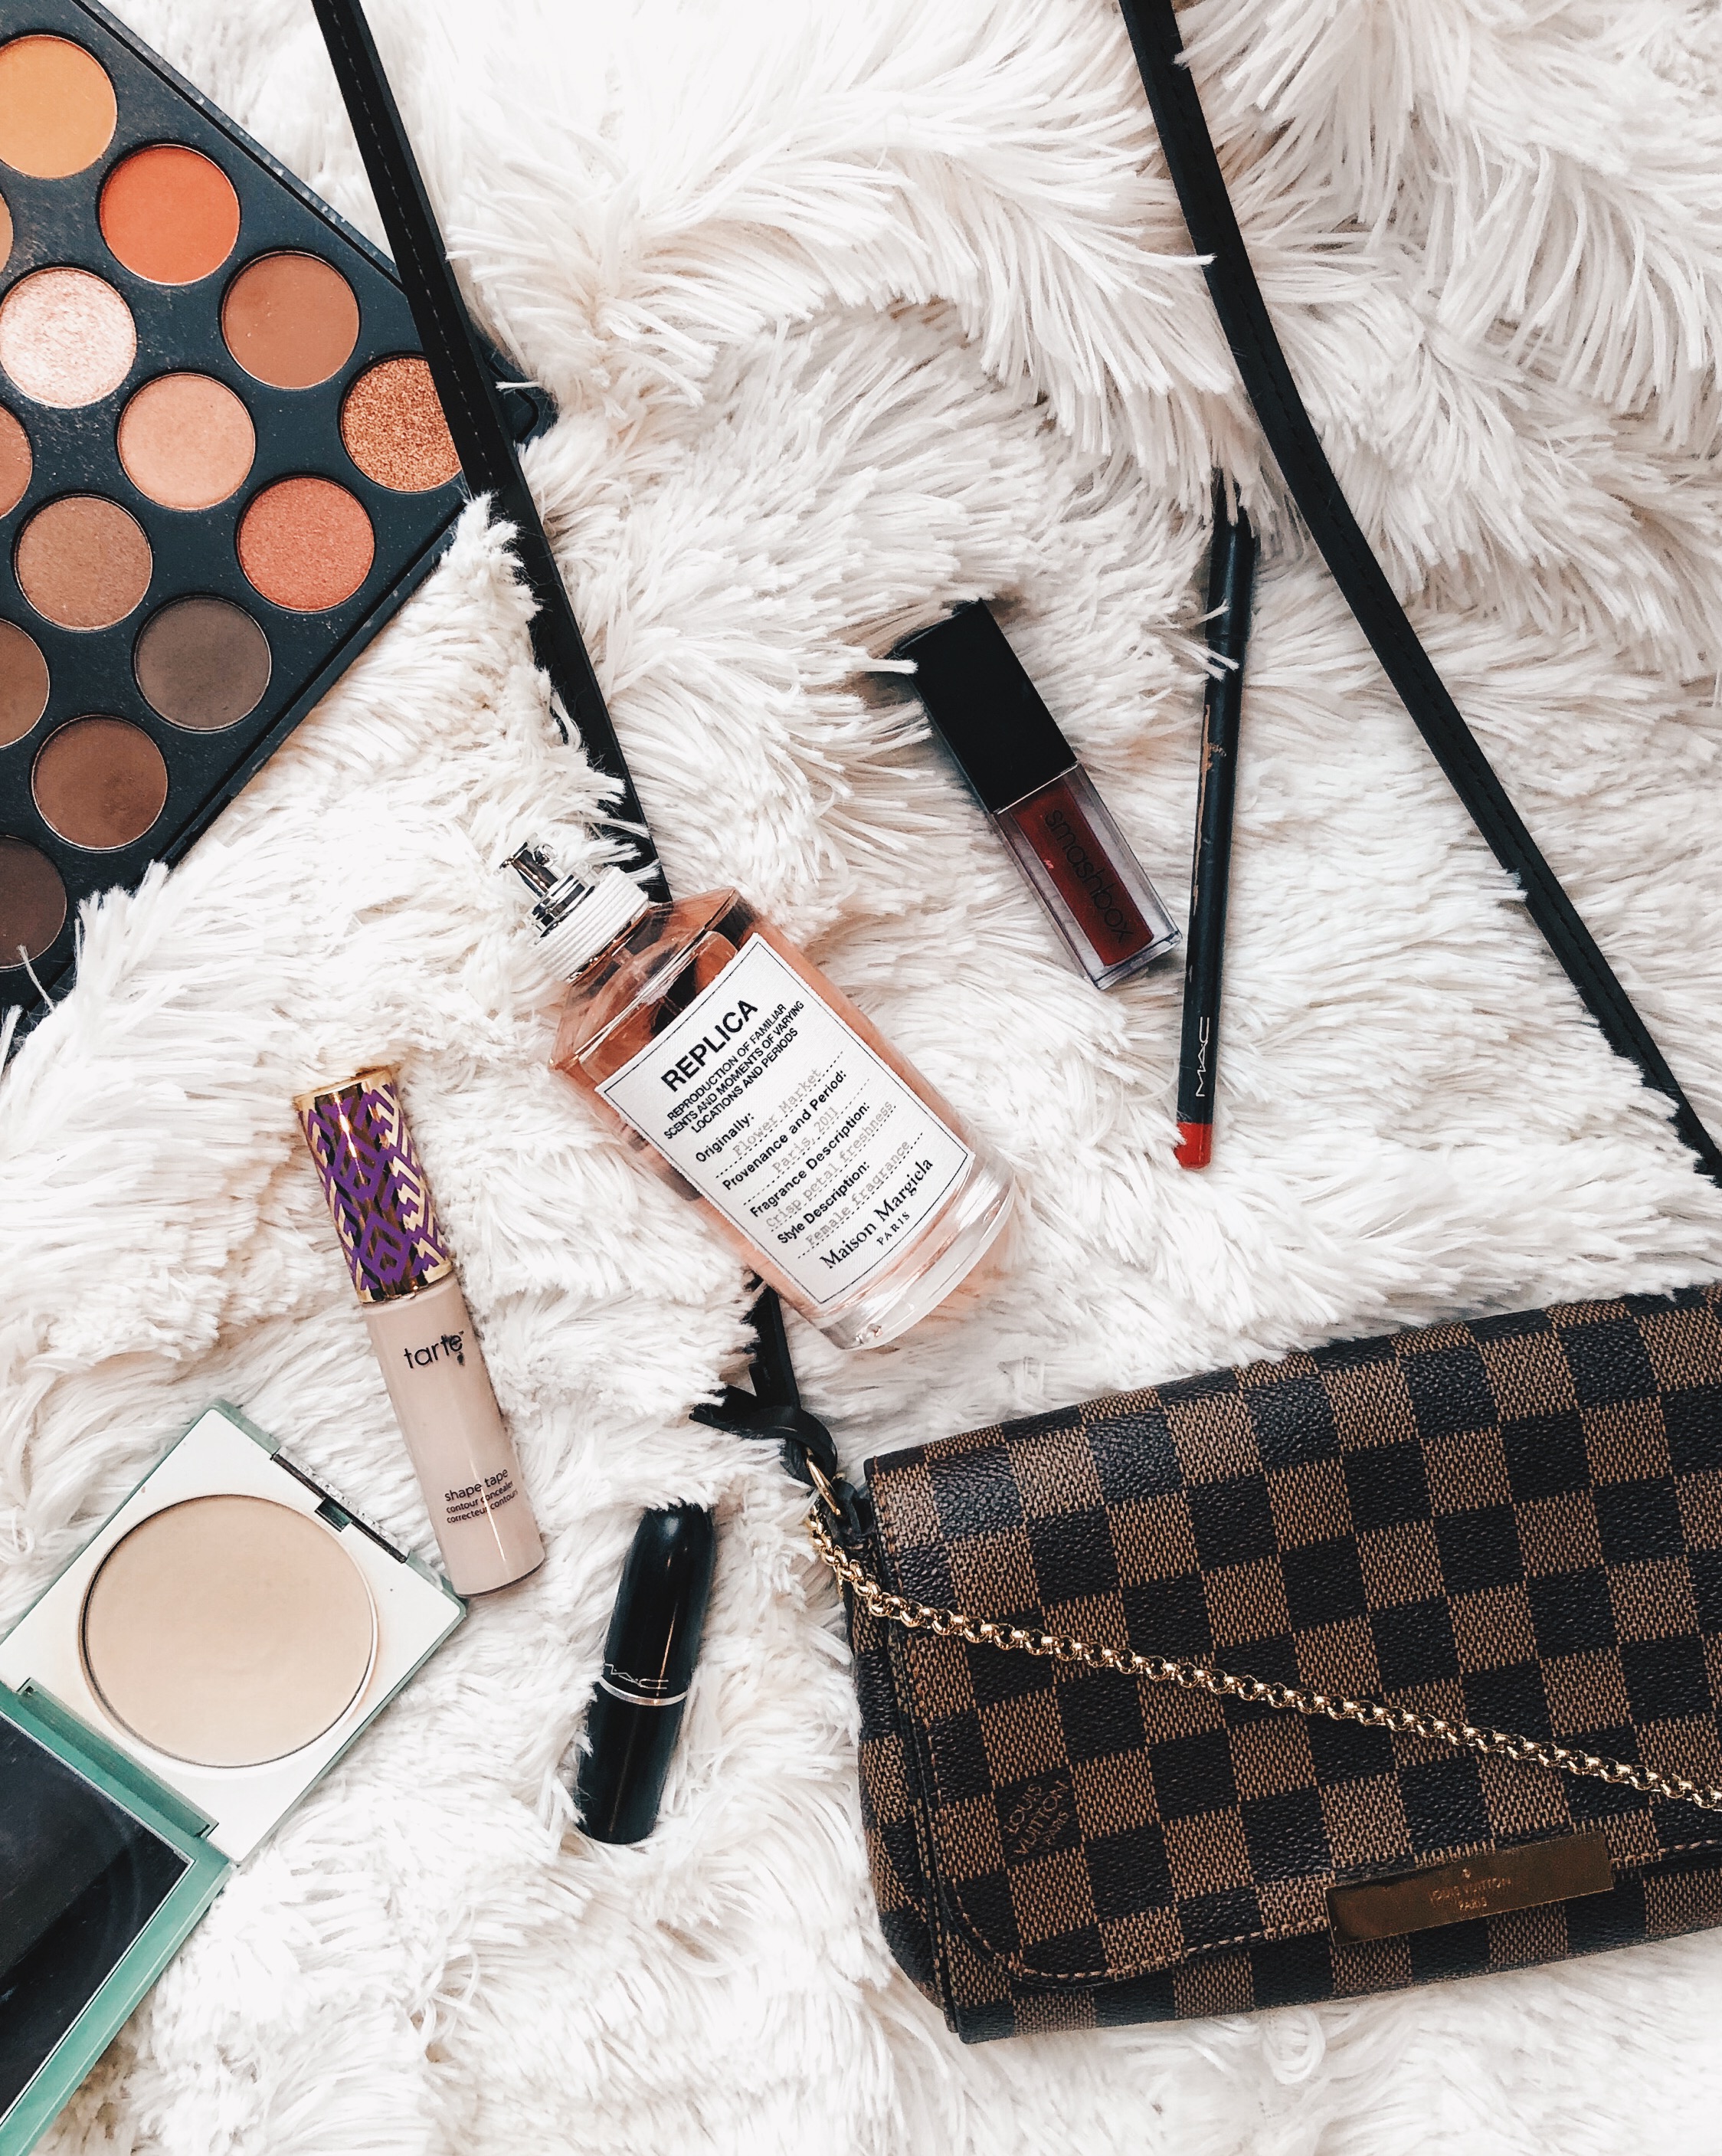
If I could only have one eyeshadow palette in my collection, this would be the one. For $23 you get 35 warm shades in both matte and shimmer finishes, which is an incredible deal considering the quality of the eyeshadows. They are rich in pigment and blend out beautifully with minimal fall out.

L’Oreal Brow Stylist Definer

I’ve talked about this product multiple times on my blog and Instagram … it’s just THAT good! This pencil (I use the shade light brunette) gives me the exact same look that I’ve achieved in the past using the Benefit precisely my brow pencil (which retails for upwards of $20). I love how much control you can have when using a fine tip eyebrow pencil.

Maybelline Matte Lipstick - Touch of Spice

This is the only drugstore lipstick that I’ve completely finished and purchased a second one of. It’s the perfect '“your lips but better” shade, and the formula gives off a matte finish without drying the lips.

L’Oreal Lash Paradise Mascara

I went through a period last year when I stopped using this mascara and I have no idea what I was thinking. This is the best mascara currently available at the drugstore. It gives the lashes both length and volume and doesn’t smudge throughout the day. I’m currently using the waterproof version but the regular one is amazing as well.

What’s your favorite makeup Item from the drugstore? Let me know in the comments below.

Slap on some lipstick and smile

Channing

snakeskin for spring? groundbreaking ✖️ bag via @amerii everything else linked on my @liketoknow.it profile on the app #liketkit #LTKspring http://liketk.it/2BEJh
should I bring my boots with me to New York?
do you ever spend an hour curling your hair only for it to be ruined in a flash flood because same
that Friday feeling ✖️ #liketkit @liketoknow.it http://liketk.it/2BAie
puff sleeves + puppies ✖️ this little number is currently 30% off and perfect for springtime #liketkit #LTKunder50 #LTKsalealert @liketoknow.it http://liketk.it/2ByTK
thankful for the past 4 years on the 40 acres BUT incredibly excited to say that I’ll be moving to New York City after graduation to begin the next chapter 💫
only a month left in ATX (how?!) so I thought it was about time I gave y’all a glimpse into my apartment that I’ve called home the past two years ... I’ve linked everything that’s still available so take a screenshot to shop ?
it’s a rosé and cheese board out on the patio kind of weekend
Tuesday 05.14.19
Posted by Channing Baker
 

What to Buy During the Sephora Sale (and a few products to stay away from)

Hello loves! The Sephora Spring Bonus event is upon us! Incase you aren’t aware, Sephora only has two sales a year (one in the fall, one in the spring). These sales are the only times during the year that you can purchase their products at a discounted rate. This event is the perfect time to stock up on all of your favorite products from Sephora, or try out a higher-priced product you’ve had your eye on, because it won’t go on sale again until the fall.

You have to have a Sephora account to have access to the sale, and the amount of money you spend at Sephora per year determines when you gain access to the sale and what percentage you can save. Below is a nifty graphic from the Trendmood Instagram explaining when the sale starts for each rewards level, and what the discount is at each level.

Screen Shot 2019-04-28 at 11.11.11 AM.png

To help y’all out, I’m breaking down my top FAVORITE products that are available at Sephora that I think are worth investing in (especially when they’re on sale!). At the end of this post I’m also including a few products that are highly rated on the Sephora website, but unfortunately didn’t work out for me. Let’s start off with my favorites:

Drybar 3-Day Bender Curling Iron

This is the best curling iron I’ve ever owned … and I’ve owned multiple over the years. I have a whole blog post where I break down exactly how I use this iron HERE, but in summary, this curling iron heats up quickly, allows you to create the perfect tossed waves, smooths the hair, and automatically shuts off after 1 hour of not being used.

Urban Decay All Nighter Setting Spray

I have been using this setting spray for years, and have yet to find anything better. This spray locks in your makeup and prevents it from melting off throughout the day. It’s oil-free, so it’s also perfect for all my sensitive skin girlies out there. I don’t know what I was doing before this product, because now I can’t go a day without applying it (it’s THAT good).

Foreo Luna 2

For a detailed explanation of why I adore this little gadget, you can refer to my blog post HERE. Don’t even bother with other skin cleansing tools, this one takes the cake!

Kate Somerville EradiKate Daily Foaming Cleanser

This was the first product from Kate Somerville that I tried and consequently caused me to become her biggest fan. I started using this cleanser back in August and it TRANSFORMED my skin. The active ingredient is sulfur, which is what my skin has the most positive response to in terms of treating and preventing acne. If you’re struggling with acne and are in the market for a new daily face wash, you need to pick this up.

Fenty Beauty Gloss Bomb

I’m not a huge fan of lip gloss, but this one is incredible. I own the shade Fenty Glow and it looks amazing over any nude or pink lipstick. It’s pigmented without being too much, has the right amount of sparkle, and is not sticky.

Laura Mercier Setting Powder

I just started using this after I received it as a gift this past Christmas, and I don’t think I will go back to another setting powder. It keeps my skin matte all day, doesn’t break me out, and doesn’t create a white flashback in photos (even though it’s translucent). This product is pricey, but a little goes a long way so I don’t see myself running out anytime soon.

Fenty Beauty Killawatt Freestyle Highlighter

I bought this highlighter duo a little over a year ago, and I still reach for it almost every single day. I love that it comes with two shades: one is more sheer and perfect for everyday use, and the other shade is extra shimmery and perfect for a night out. This duo is offered in 5 different combinations, but the one I own and love is Lightning Dust/Fire Crystal.

Benefit Hoola Bronzer

This has been my go-to bronzer for YEARS. It has a matte finish, and the original shade is not too warm or too cool. The pan size is also huge, so it’ll last forever even if you use it daily.

Kate Somerville Clarifying Treatment Toner

This toner does a great job at preventing future breakouts and evening out the skin’s texture. It doesn’t dry out my skin and the innovative packaging makes it easy to dispense and doesn’t create a mess.

Drybar Triple Sec 3-in-1 Spray

I use this spray every time I curl my hair to give my waves texture and volume. This product helps to achieve that tousled “I woke up with my hair wavy like this” look that everyone loves. And if you’re a fan of the Drybar salons like myself, you’ll love to hear that this spray smells exactly like the salons.

Drybar Blonde Ale Brightening Shampoo and Conditioner

Over the last couple of years, I have gone progressively blonder with my hair. Blonde hair does require more maintenance, but I have found that this shampoo and conditioner set is an easy way to prevent brassiness. Not only does this combo help to keep my hair color bright, but these products are nourishing and do a great job at canceling out the damage caused by the hair bleach.

Kate Somerville EradiKate Acne Treatment

This is a spot treatment that dries up pimples overnight. Like the cleanser above, the active ingredient in this product is sulfur, which is super effective in combatting acne. For $26 it works just as well (if not better) than prescription spot treatments I’ve gotten from my dermatologist in the past.

Stila Glitter and Glow Liquid Eyeshadow

I now own two of these (Diamond Dust and Kitten Karma), and I get compliments on my eye makeup anytime I wear either one. These are highly pigmented liquid eyeshadows packed with glitter. They’re easy to apply and perfect for any night out or party makeup look. I also don’t have a problem with these burning my eyes like other glitter eyeshadows I’ve tried in the past.

Just like fashion, beauty is an incredibly personal thing and just because one person likes something, it doesn’t mean it’s going to work out for you. Below are four products from Sephora that I tried and didn’t care for. If you have the same skin type as me and similar beauty preferences, I wouldn’t recommend these products. BUT you may hate the products that I love so no hard feelings if you love the products I hate!

Mario Badescu Hyaluronic Eye Cream

Although this eye cream was hydrating (and budget friendly at only $18), unfortunately it caused me to breakout with small white bumps under my eyes. I ended up returning this product after about a week of using it twice daily.

Kate Somerville ExfoliKate

I was so excited to receive a sample of this product beause 1. as you can see from above I’m a HUGE fan of Kate Somerville and 2. I had heard amazing things about this product. Fun little nugget of info: this was the first product that Kate Somerville formulated when she started her skincare line. I followed the directions on the bottle and after about 30 seconds or so of scrubbing my face started to BURN like no other. I quickly had to rinse the product off and I never used it again. This has incredible reviews online though, so maybe it’ll work for you if you’re not as sensitive as me.

First Aid Beauty Ultra Repair Cream

Like the eye cream mentioned above, I enjoyed this product at first, until it resulted in breakouts. If it hadn’t caused me to breakout I would have continued to use it because I thought it was really hydrating.

Drybar Tress Press Straightener

If you follow me on Instagram, you might remember my rant on my stories when I purchased (and was eventually let down by) this straightener. For $150 I expected it to perform better than it did. Since the plates are a bit shorter, it took me longer to straighten my hair than I’m used to, and I also had to pass through sections of my hair multiple times to get all the pieces straight.

I hope you found this post informative! Let me know what products you will be purchasing during the Sephora spring VIB promotion.

Slap on some lipstick and smile

Channing

snakeskin for spring? groundbreaking ✖️ bag via @amerii everything else linked on my @liketoknow.it profile on the app #liketkit #LTKspring http://liketk.it/2BEJh
should I bring my boots with me to New York?
do you ever spend an hour curling your hair only for it to be ruined in a flash flood because same
that Friday feeling ✖️ #liketkit @liketoknow.it http://liketk.it/2BAie
puff sleeves + puppies ✖️ this little number is currently 30% off and perfect for springtime #liketkit #LTKunder50 #LTKsalealert @liketoknow.it http://liketk.it/2ByTK
thankful for the past 4 years on the 40 acres BUT incredibly excited to say that I’ll be moving to New York City after graduation to begin the next chapter 💫
only a month left in ATX (how?!) so I thought it was about time I gave y’all a glimpse into my apartment that I’ve called home the past two years ... I’ve linked everything that’s still available so take a screenshot to shop ?
it’s a rosé and cheese board out on the patio kind of weekend
Sunday 04.28.19
Posted by Channing Baker
Comments: 3
 

Warm Smokey Eye on a Budget

This shop has been compensated by Collective Bias, Inc. and its advertiser. All opinions are mine alone. #CollectiveBias #eyesfitforroyalty 

Hello loves! Today I’m so excited to be teaming up with Covergirl to show y’all how easy it is to create an incredible smokey eye on a budget with the NEW COVERGIRL Premium Eyeshadow Palettes now available at Walmart!

IMG_1793.JPG

There are four eyeshadow palettes in the new collection each containing twelve shades. The names of the four palettes in the new collection are as follows: COVERGIRL Ascension Eyeshadow Palette, COVERGIRL Reign Eyeshadow Palette, COVERGIRL Overthrown Eyeshadow Palette, and COVERGIRL Revolution Eyeshadow Palette. All of the palettes can be purchased in store at your local Walmart in the COVERGIRL section.

IMG_1802.JPG
IMG_1921 2.JPG

Today I’m going to be showing y’all how I easily created a warm smokey eye using the COVERGIRL Overthrown eyeshadow palette. This palette is comprised of dark and pigmented shades in both matte and shimmering finishes. The blue, green, and maroon shades are perfect for adding a pop of color, but don’t let the color scare you, the neutral shades balance this palette out. Below are finger swatches of all twelve shades in the palette.

IMG_1919.JPG

Top row swatches from left to right: Dethroned, Alter Ego, Conviction, Loveless, Never Again, Taken

IMG_1775.JPG

Bottom row swatches from left to right: Wreckage, Swiped, Smoldering, Vanquished, Fallen, Legacy

IMG_1781.JPG

As you can tell from the above swatches, the pigmentation in these palettes is incredible. The only shade that I wish had more of a pop is Legacy, but other than that the color payoff is fantastic. Now lets get into the details of how I created a warm smokey eye look using the COVERGIRL Overthrown Palette.

I started out my eye look by taking the shade Fallen on a fluffy blending brush and applied it in my crease using windshield wiper motions. Since this shade was the base, I went ahead and took it up almost to the brow bone. For the lid, I used my finger to apply Alter Ego. Not only do copper shades work well in creating the perfect warm smokey eye, but they make blue eyes (like mine) POP!

IMG_1810.JPG

After getting just the right amount of copper on the lid, I took a tapered blending brush and places Dethroned in the crease (focusing on the outer edge) to darken up the eye and add some definition to the eye. I also used a pencil brush to smudge Dethroned onto my lower lash line. I topped off the look by placing Loveless on the center on my lid (I used my finger to blend this shade with Alter Ego). To finish off the eyes, I applied black liquid eyeliner and mascara. Voila!

IMG_1983.JPG

This look would be perfect for any night on the town, whether that be a sorority formal, date night, or prom! And since the COVERGIRL palettes are available at Walmart, they’re super accessible and budget friendly. I hope y’all liked this tutorial and be sure and check out the NEW COVERGIRL Premium Eyeshadow palettes at Walmart!

Slap on some lipstick and smile

Channing

snakeskin for spring? groundbreaking ✖️ bag via @amerii everything else linked on my @liketoknow.it profile on the app #liketkit #LTKspring http://liketk.it/2BEJh
should I bring my boots with me to New York?
do you ever spend an hour curling your hair only for it to be ruined in a flash flood because same
that Friday feeling ✖️ #liketkit @liketoknow.it http://liketk.it/2BAie
puff sleeves + puppies ✖️ this little number is currently 30% off and perfect for springtime #liketkit #LTKunder50 #LTKsalealert @liketoknow.it http://liketk.it/2ByTK
thankful for the past 4 years on the 40 acres BUT incredibly excited to say that I’ll be moving to New York City after graduation to begin the next chapter 💫
only a month left in ATX (how?!) so I thought it was about time I gave y’all a glimpse into my apartment that I’ve called home the past two years ... I’ve linked everything that’s still available so take a screenshot to shop ?
it’s a rosé and cheese board out on the patio kind of weekend
Thursday 04.25.19
Posted by Channing Baker
 

How I Achieved My Pre-Spring Break Glow

This post has been sponsored by Jergens Skincare. All thoughts and opinions are my own.

IMG_0157-2.jpg

Hello loves! I’m so excited to be heading to Las Vegas for spring break! Even though I know I’m going to get some sun on the trip, I love having a bit of a tan before I even leave town. To achieve my pre-spring break glow, I’ve been using the Jergens Natural Glow Wet Skin Moisturizer Medium to Tan. This product is easy and hassle-free to use, gradually adds a natural looking color to the skin, and can be found in the lotion aisle at your local Walmart or online.

IMG_0163-2.jpg

This product is a gradual self tanner which means that when used daily, a natural tan color will develop in about a week. What makes this product different from other gradual self tanners is that it is designed to be applied on wet skin. I kept my Jergens Natural Glow in my shower and applied it after I turned off the water but before I dried myself off. For best results, it’s recommended to exfoliate at least once a week to prevent the color from sticking to dead skin. Below is a before picture for reference.

When I apply this product, I use a dime size amount on each arm, and a quarter size amount on each leg. Another reason why I love this product is that it is white when it comes out of the bottle; it does not have a tan color to it that would cause any messes. The Jergen’s Natural Glow absorbs into the skin quickly, and there is no need for you to worry about it transferring onto your towel when drying off after your shower. You can truly Create Your Own Sunshine with this product!

IMG_0158-2.jpg

Another helpful tip when applying this product is to use it sparingly around your ankles, knees, and elbow. These are the spots where self tanner tends to adhere to the most. It is also recommended that you wash your hands after applying Jergen’s Natural Glow to avoid the color getting stuck between your fingers and having the dreaded “spray tan hands.”

One of the best qualities about the Jergen’s Natural Glow is that it does not have that foul self tanner scent as some other products that I have tried out in the past. Besides how great the results are, this is my favorite thing about this product.

IMG_0159-1.jpg

I hope this post gave you insight on how to easily achieve a pre-vacation glow at a low price! Be sure to check out the Jergen’s Natural Glow Wet Skin Moisturizer Medium to Tan on your next trip to Walmart.

Slap on some lipstick and smile

Channing

snakeskin for spring? groundbreaking ✖️ bag via @amerii everything else linked on my @liketoknow.it profile on the app #liketkit #LTKspring http://liketk.it/2BEJh
should I bring my boots with me to New York?
do you ever spend an hour curling your hair only for it to be ruined in a flash flood because same
that Friday feeling ✖️ #liketkit @liketoknow.it http://liketk.it/2BAie
puff sleeves + puppies ✖️ this little number is currently 30% off and perfect for springtime #liketkit #LTKunder50 #LTKsalealert @liketoknow.it http://liketk.it/2ByTK
thankful for the past 4 years on the 40 acres BUT incredibly excited to say that I’ll be moving to New York City after graduation to begin the next chapter 💫
only a month left in ATX (how?!) so I thought it was about time I gave y’all a glimpse into my apartment that I’ve called home the past two years ... I’ve linked everything that’s still available so take a screenshot to shop ?
it’s a rosé and cheese board out on the patio kind of weekend
IMG_0160-2.jpg
IMG_8807.JPG
Friday 03.15.19
Posted by Channing Baker
Comments: 1
 

Ice Rolling 101

Hello loves! If you’re following me on Instagram, you’ve probably seen me post about ice rolling on my stories. Some of y’all have sent me DMs asking about my ice roller and what the benefits of ice rolling are, so I thought I would just answer everything in a blog post! (Picture below depicts how I feel after ice rolling!)

IMG_7503.JPG

I first heard about ice rolling from Payton Sartain on Instagram, and she has a whole blog post about it that you can check out HERE. Over the past couple months I’ve seen more and more people post about different facial rolling techniques, so I finally decided to invest in one (and by invest I mean spend $11 on Amazon).

The benefits of ice rolling include de-puffing the skin, increasing circulation, reducing swelling, and brightening under eye circles. Like most skincare products and procedures, results will not be evident after just one use, but after consistent use over time you will see improvement. My favorite time of day to use my ice roller is right when I wake up, because that is usually when I am the most puffy.

If you watch my Instagram stories, then you would know that my original ice roller broke (don’t worry I immediately purchased a second one). The original one I had came with a stainless steel head, along with a plastic head, but I preferred the steel one. So when I went to purchase a second ice roller, I found that the exact same style is sold with only the steel head, so I saved a couple bucks buying the second one. Once it comes in the mail, all you have to do is stick it in your freezer, wait a few hours, then you’re ready to roll!

I hope this post answered your questions about ice rolling! Let me know if you decide to purchase one.

Slap on some lipstick and smile

Channing

Tuesday 02.19.19
Posted by Channing Baker
 

My Skincare Routine: February 2019

Hello loves! If you’ve been keeping up with my blog for a while, you would know that I’ve been incorporating new products and steps into my skincare routine over the last couple of months. I realized I hadn’t shared my entire routine with y’all, so I thought today would be the perfect day to do so! I’m walking y’all through the steps of my routine in order, and as always, everything I mention in this post will be linked via the pink links and the photos at the end.

p.s. I follow the same routine morning and night … Now let’s get into my routine!

IMG_7133.JPG

Cleanser

I have a whole post covering this topic, but to give you a recap, the cleanser I’ve been loving for the last 6 months is the Kate Somerville Eradikate Daily Cleanser Acne Treatment. This cleanser is formulated with sulfur, which does an incredible job at combatting acne. To get the deepest clean possible, I massage in the cleanser with the Foreo Luna 2, a tool that does a fantastic job at removing all impurities from the skin in one easy step. Since I have pretty oily skin, I can use this cleanser twice a day without drying out, but if you suffer from acne but are on the more dry side, I would suggest only using this cleanser once a day.

IMG_7118.JPG

Toner

Continuing with the Kate Somerville line, I follow up my cleansing step with the Clarifying Treatment Toner. Not only do I love this toner because it feels refreshing and keeps my acne under control, but the packaging is innovative and makes dispensing the product onto a cotton pad incredible easy and mess-free.

IMG_7115.JPG

Eye Cream

Over the last year I’ve started to incorporate an eye cream into my skincare routine to prevent wrinkles and early signs of aging. Lately I’ve been using this T2 Oxygen Eye Cream by VIIcode. The brand was kind enough to send me this product for my consideration. This cream is formulated with elderberries, evening primrose, and jojoba oil, and I love how it leaves my under eye area feeling soft and moisturized. This product is hydrating while still being lightweight, so a residue isn’t left behind, a problem I’ve had with other eye creams I’ve tried out in the past. I use this eye cream both day and night to make sure my eye area is extra hydrated.

IMG_7113.JPG

Moisturizer

This Tula Aqua Infusion Oil-Free Gel Cream is a new addition to my routine, but it gives me everything that I need from a moisturizer. It’s oil free, incredibly lightweight, yet does an amazing job at moisturizing the skin. Over the last year I’ve seen so many people post about Tula on Instagram, but I didn’t know if I should believe the hype. Since Tula is an e-commerce based company, I was skeptical to order a skin care product without testing it out like I would at the store. I’m so glad I did because this moisturizer is AMAZING. Take my word for it, and go order yourself a bottle if you’re like me and have normal to oily skin.

IMG_7120.JPG

Spot Treatment

I don’t use this every time I do my skincare routine, but when I’m having breakouts this is what I use to combat them. Like my cleanser, the active ingredient in this sport treatment is sulfur, which works the best for me in terms of clearing up breakouts. This product is only $26, which is an amazing deal considering it works just as well as some of the prescription topical acne treatments that I’ve tried.

IMG_7117.JPG

Let me know if you decide to incorporate any of these products into your skincare routine. See y’all in my next post!

Slap on some lipstick and smile

Channing

Tuesday 02.12.19
Posted by Channing Baker
 

How I Achieve My Everyday Wavy Curls

Hello loves! About a year ago, I wrote a post about how I curl my hair. Well, since the my routine has changed because I have shorter hair and a new curling iron. Since I’ve been following this new routine for a couple of months now, I thought it would be helpful to show y’all my process now that I’ve perfected it. P.S. I apologize for the quality of the lighting in the photos where I show the process …. the lighting in my bathroom is less than ideal and not even my ring light could help me.

IMG_6249 2.JPG

The Tool

To curl my hair I use the Drybar 3-Day Bender in the 1.25 inch size. I received this curling iron for my birthday and it has been my go-to for curling my hair ever since. At $145 it’s on the pricier side, but I have never used a curling iron that leaves my hair as soft and smooth as this one does. This curling iron also has multiple temperature settings (getting as hot at 440 degrees … I usually set mine to 380), heats up in 60 seconds, and shuts off automatically if not used for an hour. The curling iron has a rotating barrel which feels different at first if you’re accustomed to traditional curling irons, but after watching a tutorial on the Drybar site and a bit of practice I felt comfortable using the device.

IMG_6312.JPG

The Method

I start the curling process by spraying my hair with heat protectant, then separate my hair into layers. I perform this process on freshly washed hair that has air dried. I start curling with the pieces of hair closest to my face. I curl these pieces away from my face, then alternate directions from there (so curls go towards face, away from face, towards face, etc.) Starting at the root, I clamp the hair, rotate the barrel, and leave the ends sticking out from the curling iron.

IMG_6283.JPG
IMG_6296.JPG

After about 5 seconds on the barrel, I unroll the hair, then release the clamp. Since I prefer a wavy a look, if the curl ended up being too tight I’ll pull on the end to straighten it out a bit. I repeat these steps layer by layer until my whole head is curled. If you want a video visual of this process I have it on my Instagram story under the Blog highlight!

IMG_6308.JPG

The Products

Even though I’ve changed my curling method, the finishing products that I use have not changed. After all of my hair is curled, I spray some of the Drybar Triple Sec Spray while running my hands through my hair to brush out the curls. I love the texture that this spray adds to my hair. I top it all off with a quick spritz of the L’Oreal Elnett Satin hairspray (I prefer the unscented version).

I hope this post gave you some insight on how to achieve the perfect wavy curls. I hope everyone has an amazing weekend!

Slap on some lipstick and smile

Channing

snakeskin for spring? groundbreaking ✖️ bag via @amerii everything else linked on my @liketoknow.it profile on the app #liketkit #LTKspring http://liketk.it/2BEJh
should I bring my boots with me to New York?
do you ever spend an hour curling your hair only for it to be ruined in a flash flood because same
that Friday feeling ✖️ #liketkit @liketoknow.it http://liketk.it/2BAie
puff sleeves + puppies ✖️ this little number is currently 30% off and perfect for springtime #liketkit #LTKunder50 #LTKsalealert @liketoknow.it http://liketk.it/2ByTK
thankful for the past 4 years on the 40 acres BUT incredibly excited to say that I’ll be moving to New York City after graduation to begin the next chapter 💫
Thursday 01.24.19
Posted by Channing Baker
 

The Gadget That's Changing My Skin: Foreo Luna 2 Review

Hello loves! I asked on Instagram if y’all wanted to see a blog post all about my new Foreo Luna 2 that I received for Christmas, and the majority voted yes. I have so many great things to say about this little guy, so I thought this would be a helpful post for y’all if you’re looking to up your skincare routine in 2019.

The Sephora website describes the Luna 2 as “An ultra-hygienic cleansing and anti-aging device that deeply cleanses while diminishing the appearance of fine lines”. The Luna 2 is comprised of silicone bristles that vibrate to deeply cleanse the skin. Unlike brush head cleansing tools like the Clarisonic, the silicone is easy to clean, doesn’t need to be replaced every few months, and is super sanitary. There are multiple types of Foreo Luna 2 devices on the market, but the model I have is for normal skin (it’s the pink one!). There are also Luna 2 models targeted towards oily, combination, and sensitive skin, along with a model specifically for men, so there is a device for everyone.

IMG_5635.JPG

To use the Luna 2, simply wet the skin, apply your choice of cleanser (this one is my current favorite) directly to the skin, then turn on the device. One of the awesome features of the Luna 2 is that there are 12 different vibration settings, so you can customize it to what feels best for your skin. The device has a 2 minute timer and automatically turns off when the time is finished. The Luna 2 is completely waterproof so you can use it in the shower with ease. I have been using my Luna 2 everyday since Christmas and I haven’t had to recharge it yet (my old Clarisonic would’ve already been dead by now lol).

IMG_5633.JPG

Since incorporating the Luna 2 into my skincare routine I’ve only had about 2-3 small breakouts (which can are most likely due to the fact that I was traveling and it was my time of the month when I was in California). After washing my face using my Luna, my skin feels more soft and truly clean than it does after cleansing using just my hands. I can’t wait to see more improvements in the quality of my skin as I continue to use this device!

Slap on some lipstick and smile

Channing

Tuesday 01.08.19
Posted by Channing Baker
 

2018 Edit: The Best of Beauty and Fashion

Hello loves! I can’t believe we’re just a few short days away from 2019. To wrap up the year, I rounded up a list of my favorite fashion and beauty items that I accumulated throughout the year. These items are all essentials in my collection now, and I’m so excited to share them with y’all. All of these pieces pictured below have my stamp of approval and I would highly recommend them to all of y’all. I hope you found this helpful!

Drybar Blonde Ale Shampoo + Conditioner | Fenty Beauty Highlighter | Frayed Hem Jeans | Drybar Curling Iron | Reversible Leather Tote | L’Oreal Mascara | Kate Somerville Cleanser | Cartier Ring | Kate Somerville Spot Treatment | Loving Tan 2 Hour Express | Black Jumpsuit | Black Slip Ons

I’m sorry this was such a short post … I’m currently in California and thought I was going to have more time to wrap this post up before I left. Nevertheless, I hope you enjoyed seeing what products I loved this year!

Slap on some lipstick and smile

Channing

Sunday 12.30.18
Posted by Channing Baker
 

Easy and Affordable Hair Care Routine ft. Biotera

This shop has been compensated by Collective Bias, Inc. and its advertiser. All opinions are mine alone. #CollectiveBias #HaircareWithIntegrity 

Facetune_23-11-2018-22-07-54.JPG

Hello loves! I’m so excited to be partnering with Biotera and their Natural Origin line for today’s easy and affordable hair care routine for dry hair that needs restoring. This line is extremely affordable for the quality and is available at Sally Beauty Supply stores and online HERE.

IMG_3111 2.JPG

If you’ve kept up with my beauty posts for a while now, you would know that I color my hair and frequently use heat styling tools, resulting in damaged feeling hair. The Biotera Natural Origin Restore line is formulated with Goji Berry and Chia extract, leaves my hair feeling soft and smooth, and the scent is amazing (which is a bonus!). When using this line, I first start out with the Biotera Natural Origin Restore Shampoo, which retails for $10.99. This shampoo is free from silicones, sulfates, and parabens, which makes it ideal for y’all who are like me and have color treated hair. I only wash my hair every three days or so, and the scent lingers in between washes, which I love. After I shampoo, I use the Biotera Natural Origin Restore Conditioner, which also retails for $10.99. Along with being free from silicones, sulfates, and parabens, the line is also free from dyes. The conditioner is extremely nourishing without weighing down the hair. 

Facetune_25-11-2018-09-40-08.JPG

To complete the routine, I end by using the Biotera Natural Restore Origin Masque. The masque is to be used on damp hair, so I will wring my hair out while still in the shower before applying. I like to stay in the shower for this step for the ease of rinsing it out. This masque is designed for dry hair, and my ends are the driest part of my hair, so I only apply the masque from the middle of my hair to the ends. After it’s applied you simply rinse it out, and you’re left with silky, healthy feeling hair. This masque is my favorite item from this line, and like the shampoo and conditioner, it also retails for $10.99.

Facetune_25-11-2018-09-48-05.JPG

I hope you enjoyed this easy and affordable hair care routine featuring the Biotera Natural Origin Restore line. Be sure to check it out in your local Sally Beauty Supply store or via the link HERE.

Slap on some lipstick and smile

Channing

Tuesday 12.04.18
Posted by Channing Baker
 

Everyday Makeup Routine

Hello loves! I haven't done a makeup post in a while, so I thought it was time I share my everyday makeup routine with y’all. This the makeup routine I use on a regular basis for school or work. I have been using most of the products for multiple years, so it’s safe to say they’re my ride or die! I hope you find this post helpful!

IMG_2751.JPG

For the face, I’ll use a light layer of the Clinique Beyond Perfecting Foundation all over the face. I’ll then use the Tarte Shape Tape concealer under my eyes and over an blemishes I may have. I finish up my base with the Clinique Stay Matte Sheer Pressed Powder (I use shade invisible matte). When I’m doing my everyday look, I try to keep my base as light as possible in order to not feel caked throughout the day.

As for brows, I’ve been using a new brow product that I haven’t spoken about before on the blog. I’ve been loving the Benefit Precisely my Brow in shade 3. I realized my previous L’Oreal brow pencil was looking to dark with my light hair, and it did not come in a lighter brunette shade. The Benefit one has the same slim pencil tip that I like, and the shade is perfect for my hair color! I always top off my brows with the Glossier Boy Brow in Brown. This product does an amazing job at locking the brows into place while also adding a bit more color and definition.

When I’m doing my minimal everyday look, I don’t like to go overboard on the eyeshadow. I’ll simply blend a medium brown eyeshade from my Morphe 35O palette into my crease to add some depth to the eyes. I’ll then line my upper lash line with the L’Oreal Infalliable Super Slim Liquid Eyeliner. If you’re a beginner with liquid eyeliner, I definitely recommend this one; it’s so simple to use! I finish up my eyes with the L’Oreal Voluminous X Fiber Waterproof Mascara.

IMG_2769 2.JPG

After I finish up the eyes, I add a few finishing touches to the face. I’ll apply a bit of the Benefit Hoola Bronzer to add a bit of definition to the face. I’ll then apply a tiny bit of blush and highlight. I switch these up from day to day, but my two current favorites are the Tarte Amazonian Clay Blush in Paaarty and the Fenty Killawatt Freestyle Highlighter in Lightning Dust/Fire Crystal. I use the less intense side of the highlighter for my everyday look. I save the more glittery shade for nights out.

I always seal up my entire look with the Urban Decay All Nighter setting spray. This spray does an amazing job at locking in my makeup and keeping it from melting off during a long day of school or work.

I hope you enjoyed learning about what products I use on a daily basis! Let me know what other kinds of beauty posts you would like to see in the future.

Slap on some lipstick and smile

Channing

Monday 11.05.18
Posted by Channing Baker
 

How I Keep My Hair Color Fresh: Tips and Products

Hello loves! Over the last couple of years, I have highlighted my hair lighter and lighter. As most people who highlight their hair know, it can be a challenge to keep your hair looking fresh in between coloring appointments. I have finally found a group of products and a hair routine that works for me, and helps my highlights to stay fresh for multiple months in between appointments. I hope you find this helpful!

IMG_9277.JPG

Products

I use two different sets of shampoo and conditioner to maintain my color. The first is the DryBar blonde ale shampoo and conditioner. I can visibly tell a difference when I use this set. It’s the most vibrant purple shampoo I’ve used, so don’t be scared when you pour it out! This set is so strong that it’s recommended to only use every two to three washes.

When I don’t use this set, I use the L’Oreal Ever Pure Sulfate Free Shampoo and Conditioner for blondes. It’s important to use sulfate free products when you color your hair, and this set is extremely affordable and perfect for alternating with the DryBar set.

After washing and conditioning my hair, I use the It’s a 10 Miracle Leave In for blondes. I’ve been a fan of the original Miracle Leave In for years, and this blonde one is just as good, it just adds extra color protection for light hair.


Tips

The most important thing you can do to preserve colored hair is to not wash it every day. Too much product and over washing can make your color fade faster. I only wash my hair 2-3 times a week, and I don’t have a problem with my color fading fast! Another tip I have is to not use too much heat on your hair. Coloring already damages your hair enough, so using less heat will prevent further damage.

I hope you enjoyed reading about my favorite products and tips to preserve your highlights! What’re your favorite products to use?

Slap on some lipstick and smile

Channing

Wednesday 10.03.18
Posted by Channing Baker
 

The Skincare Line I'm Obsessing Over

Hello loves! It’s been a while since I’ve done a beauty post, and even longer since my last skincare post. As someone who has always struggled with acne, I am always on the hunt for products that will help clear up my skin and prevent future breakouts. I recently decided to try products from Kate Somerville on a whim, and I have no idea why I didn't try this line sooner! 

IMG_8792.JPG

I've been using two Kate Somerville products daily for the past couple weeks and I absolutely adore both of them. Both products are from the EradiKate collection, her line of products dedicated to acne treatment. What I love about both products is that they are formulated with sulfur. I have learned over the years that my skin reacts really well sulfur, as opposed to other active ingredients that target acne like salicylic acid.

IMG_8805.JPG

I first picked up the EradiKate Daily Cleanser when I was breaking out pretty bad a few weeks ago. I wanted to step up my cleanser game, and I noticed this cleanser was formulated with sulfur, which I knew is an active ingredient that works extremely well for my skin. This cleanser is super creamy and is gentle enough to use twice a day. 

IMG_8813.JPG

Since I loved the cleanser so much, during the Sephora VIB sale I decided to pick up the EradiKate Acne Spot Treatment. Like the cleanser, the active ingredient in this product is sulfur. The treatment dries up any existing breakouts and helps to prevent new ones. Since my skin is oily, I can get away with using this treatment twice a day without my skin drying out. 

IMG_8811.JPG

I hope you found this post helpful! Do you have any acne products that you swear by? Let me know!


Slap on some lipstick and smile

Channing

Wednesday 09.05.18
Posted by Channing Baker
 

My Top 3 Favorite Lipsticks of All Time

Hello loves! In honor of National Lipstick Day, I thought I'd hop on here and make a quick post to show some love to my 3 favorite lipsticks of all time. Lipstick is my favorite makeup item and if you've been following my blog for a while, you would know that I've been signing off every post since 2014 with "slap on some lipstick and smile." (also how iconic was this moment in Breakfast at Tiffany's?!)

Screen Shot 2018-07-29 at 6.39.29 PM.png

Lipstick can instantly elevate a look and make you look instantly put together, even if you're barely wearing any other makeup. These 3 formulas and shades are my absolute favorites and have been my go-to's for years. 

MAC Russian Red | Charlotte Tilbury Hepburn Honey | Maybelline Touch of Spice

I hope you enjoyed this quick post! What's you're all time favorite lipstick? Let me know below!


Slap on some lipstick and smile

Channing

Sunday 07.29.18
Posted by Channing Baker
 

Nordstrom Anniversary Sale 2018 Beauty Picks

Hello loves! Last night on Instagram I asked if y’all wanted to see my beauty picks from the Nordstrom Anniversary sale, and majority said yes!  (make sure to follow me on Instagram @thechanchic for updates and more polls) I am definitely more comfortable with clothing and accessories than with beauty products, so that’s why this list is smaller that my original NSale post. I have tried at least one thing in every set, so I can confidently recommend these products to y’all! All of these sets are exclusive to the Nordstrom Anniversary Sale, and since they’re sets they will save you some $$$$$. Enjoy!!

Stila glitter eye shadow set   $35 ($72 value) | MAC mini lipstick set $32.50 ($50 value) | Drybar set $165 ($240 value) | Charlotte Tilbury lip set $60 ($90 value) | Diptyque candles set $55 ($75 value) | BeautyBlender set $35 ($60 value) 


What will you be purchasing? I definitely need to pick up the BeautyBlender set since one alone is $20 and this set includes two blenders, cleanser, and a travel case. I hope you’re enjoying my sale content and happy shopping! 


Slap on some lipstick and smile

Channing  

Wednesday 07.18.18
Posted by Channing Baker
 

How I Use Light Therapy at Home to Improve my Acne

This post has been compensated by Collective Bias, Inc., and Neutrogena. All opinions are mine alone. #NeutrogenaLightChallenge #CollectiveBias

Hello loves! I’m so excited to be partnering with Neutrogena Light Therapy today as a part of the #NeutrogenaLightChallenge to share a new and innovative way to improve your acne at home. As I have said in many of my other blog posts, I have oily, acne-prone skin and have struggled with acne most of my life. I am always looking for new ways to improve my acne without breaking the bank. Neutrogena has developed two Light Therapy products, a mask, and an acne spot treatment, to treat acne at home...and the best part is they’re available at Walmart!

Facetune_01-06-2018-09-09-51.JPG

Light therapy was once only available in dermatologists’ offices, but now Neutrogena has created patented products for at home use. The Light Therapy mask is perfect for treating acne all over the face while the Light Therapy Spot Treatment is perfect for an occasional pimple.  While treatment at a dermatologist office can be time-consuming, these Neutrogena Light Therapy products are perfectly suited for multitasking; the mask has a viewing slot for your eyes. Both Neutrogena Light Therapy products have clinically proven results with 98% of users reporting fewer breakouts, and visible results in as little as one week, with the results improving with continued use.  I’ve been using the Neutrogena Light Therapy Acne Spot Treatment for the last month and I’m very pleased with the results! I chose this Light Therapy product because my acne has been pretty much under control lately, with the occasional break out here and there.  I am so pleased with the visible results that I've seen in the last month. I've been able to reduce my breakouts more quickly which has resulted in me wearing less concealer each day to cover them up! This product really helps to quickly minimize zits and I can't recommend it enough.

EF146BBB-838F-4A6A-9336-060A51451626.JPG

The Acne Spot Treatment is simple to use. You simply hold the device over your breakout and press the button to activate the light. The treatment combines red and blue lights to kill acne-causing while also reducing inflammation. The device is equipped with a self-timer, so after two minutes the light will turn off automatically.  For optimal results, it is suggested that you use the treatment 2-3 times per day. In the last month of using this product, I developed a few larger zits on my nose and on my forehead. I would use the treatment when I woke up and before I went to bed. After using the product I coudld tell that my pimples had decreased in size, and they continued to lessen with consistent use. I love how quick yet effective this product is!

The Acne Spot Treatment retails for $16.96 at Walmart, which is an incredible price considering in-office acne treatments can cost as much as $500. The treatment is so effective that products containing acne-fighting chemicals such as salicylic acid and benzoyl peroxide do not need to be used while using the Light Therapy products.

C66EC1C8-50A8-4F4B-B449-EFC5AF9C75A4.JPG

While using the Light Therapy Acne Spot Treatment, I’ve been washing my face with the Neutrogena Fresh Foaming Face Cleanser and Makeup Remover in the morning and at night. This cleanser is gentle enough to use twice a day and I love how it foams up; it makes me feel super clean! It’s soap-free, alcohol-free, and oil-free, which is perfect for my sensitive skin.

C86B51E5-54CF-4647-A1D2-4532D202BBD3.JPG

Before I wash my face at night, I’ve been using the Neutrogena Makeup Remover Cleansing Towelettes (I prefer the fragrance-free kind). These do an amazing job at removing makeup to make the cleansing process easier and more effective. Removing your makeup is one of the best things you can do to prevent acne.  

946A7CDB-A51E-4FEA-81F6-ED5A8755CC3B.JPG

I hope you enjoyed learning about how I use the Neutrogena Light Therapy Acne Spot Treatment to help improve my acne at home. Let me know in the comments below if you pick up any of the products I mentioned at Walmart!

F6EBF81E-E4CA-48DE-87CD-E8652A9F10E0.JPG

Slap on some lipstick and smile

Channing 


Friday 06.01.18
Posted by Channing Baker
Comments: 2
 

4 Masks for Oily Skin

Hello loves! Y'all really seemed to enjoy my morning skincare routine post, so today I thought I would some more of my favorite skincare products. I love winding down from a long day with a face mask, and not only is it relaxing, but it leaves my skin feeling so good afterward!

My favorite kinds of masks to use are peel off masks and sheets masks because of how easy and mess free they are. As I mentioned in my last skincare post, I have oily acne prone skin, so I have to be very careful when selecting skincare products. The 4 masks I'm going to talk about below haven't caused me to break out and leave my skin feeling great. If your skin is similar to mine, let me know what your favorite mask is in the comments below.

Boscia Luminizing Black Mask

Dr. Jart Pore Minimalist Black Charcoal Sheet Mask

First Aid Beauty Skin Rescue Purifying Mask

Charcoal Pore Minimizing Sheet Mask

One of my favorite ingredients in a mask is charcoal; I love how it absorbs oil from the skin. All of these masks help keep my skin not oily while also aiding in removing dirt and buildup. These masks are all super affordable and I definitely recommend them for anyone struggling with oily, acne prone skin. 

What's your faovrite mask? Have you tried any of these masks before? Let me know down below!


Slap on some lipstick and smile

Channing

Tuesday 05.29.18
Posted by Channing Baker
 

Morning Skincare Routine

Hello loves! I hope you all have been having a great week.  Before I got ready this morning, I had the idea that it might be fun to do a casual post walking y'all through my morning skincare routine. This is a super casual post, so I apologize in advance for the poor lighting in my bathroom. As always, you can shop the products I'm using by clicking on the photos or links!

C8F3F540-6D81-4071-B1CE-7F707DB6C513.JPG

For those of you who don't know, I have oily, acne-prone, and sensitive skin. I have a hard time finding products that get the job done and don't irritate my skin. I'm so glad I've nailed done a morning skincare routine that's easy and makes my skin look and feel great! I highly recommend all of the products I use to anyone with a similar skin type. Without further adieu, let's hop into my morning skincare routine!

Cleanser

74CA6791-508F-489E-8AB4-D25C60B87B30.JPG

This cleanser has been my ride or die for years.  It's incredibly gentle (the Daily Facial Cleanser burns my face) and just simply leaves the face feeling fresh...which is all that I need in the morning. 

Toner

D1051C88-CE1C-46F3-8FEF-70EFAD46FD11.JPG

Toner is a step that I just recently added to my skincare routine and I can definitely tell a difference! This clarifying toner is in Murad's acne line and does a great job at decreasing oiliness and preventing breakouts. To apply, I pour a little bit on to a cotton round and swipe all over the face. I want to try more Murad products because this one is that good! 

Eye Cream

321809C4-6305-46F2-BF72-62839984E796.JPG

The best way to prevent the signs of aging is to keep the under eye area moisturized. This one is perfect for oily skin because it is very lightweight. It also has caffeine in the formula, which is perfect for waking up the undereye area in the morning. 

Moisturizer

04396051-942C-4E34-A30D-B4AC00F967E0.JPG

This is my favorite moisturizer that I've ever tried! It's lightweight, while still being moisturizing, and has SPF15! As mentioned earlier, I love Cetaphil because it doesn't break me out!

I hope you enjoyed my morning skincare routine! Let me know if you would like to see one for nighttime.

Slap on some lipstick and smile

Channing

Thursday 04.26.18
Posted by Channing Baker
 

Self Tanning Routine

Hello loves! It's been a hot minute since I've last done a beauty post. I've had three spray tans in the last month due to spring break and dance competition season, and once my most recent one faded I was starting to miss the glow. Today I decided to apply self-tanner to get my glow back, and as I was applying it, I realized I haven't shared anything about self-tanner on the blog, so today I thought it would be fun and helpful to share how I apply self-tanner, what products I use, and a few tips and tricks.

Preparation

Prepping the skin is necessary for any type of faux tan to apply without streaks and last the maximum amount of time. Smooth and moisturized skin will absorb the self-tanner best without leaving any streaks or patches. I first start out by shaving my legs with a moisturizing shave cream (I love this one by EOS). Then I use an exfoliator to scrub away any dead skin. I personally love a corse exfoliator and have been using the Foaming Sugar Scrub from Bath and Body Works. To get an extra intense scrub, I will apply the exfoliator with a loofa. After this, I apply a lightweight, unscented moisturized. I prefer this rather than a thick moisturizing cream because there are fewer chemicals that could interact with the self-tanner.

Application

My favorite self-tanner to use is the St. Moriz Instant Self Tanning Mousse. It's only $13 and works magic on my skin! Since I am pretty fair to begin with, I use the shade medium (the product comes in medium and dark). The product does come out colored, so purchasing a tanning mitt is necessary to avoid staining on your hands. 

FA1922FD-22FE-4092-B01A-9C12A7BE52C5.JPG

Once I have pumped out the product on to the mitt, I swipe it on to my body then use circular motions to blend it in. I use about 3-4 pumps for my legs and 1-2 pumps for my arms (depending on how dark I want to be. The product soaks into the skin quickly and doesn't leave you feeling sticky after. 

95E12454-42A5-44D7-86B1-ED147D64DE68.JPG

Using these products and this routine, I can normally get 3 days out of a self-tan. It doesn't last as long as a spray tan for me, but for a fraction of the cost and the convenience of being able to do it at home, it's a great way to get a faux glow. 

I hope y'all found this helpful! Let me know if you have any questions or have any suggestions for new blog posts.


Slap on some lipstick and smile

Channing

Monday 04.16.18
Posted by Channing Baker
 

My Favorite Red Lipsticks

Since we're still in the month of love, I thought it would be appropriate to share my favorite red lipsticks with y'all. As you can probably tell by my blog tagline "slap on some lipstick and smile," I love lipstick! A bright red lip can quickly pull together a look and add an extra bit of glam. I've tried numerous red lipsticks in a variety of formulas, but today I'm sharing with you my top 3 of all time!

MAC Matte Lipstick in Russian Red

This has been my go-to red lipstick for years! It's a classic red that looks great with any makeup look. Not only is it super pigmented, but it doesn't dry out the lips even though it's a matte formula. If I could only recommend one red lipstick to you, this would be the one! BONUS: it looks great paired with the MAC Lip Pencil in Cherry.

Smashbox Always On Matte Liquid Lipstick in Disorderly 

If you're looking for a deeper red lipstick, this is the one for you. The formula is extremely lightweight while also being long wearing. Like the MAC one, it has a matte finish. I absolutely love to wear this when I want to branch out from a traditional red! 

Colourpop Ultra Satin Liquid Lipstick in London Fog 

This is another lightweight liquid formula, but unlike the previous two, has a satin finish. The great thing about this formula is that even though it's a satin finish, it still dries down and doesn't smear everywhere. This is the brightest and most blue toned red out of the bunch, but its' still one of my favs!


7E6F4A14-628B-4537-B849-F938728BA500.JPG

I hope y'all enjoyed this post and found it helpful. I'd love to know what you're favorite red lipstick is!


Slap on some lipstick and smile

Channing

Thursday 02.22.18
Posted by Channing Baker
 
Newer / Older

Powered by Squarespace.